Share This Post
At my house, we come together at the table for dinner most nights of the week. But for occasional family evenings, we love to make snack platters with finger foods to enjoy by the fire. Especially around the holidays. These are special memories that the kids treasure.
Last weekend I spruced up a deli platter from Save-On-Foods for a family Christmas movie night. I loved the idea of making a festive family charcuterie board. Since we aren’t socializing, running around to Christmas parties, and hopping from one holiday activity to the next around the city, I’m loving making our own little family nights a little more magical with special treats like this.
As a food blogger and photographer, I live to style food and there’s nothing like a cheese and charcuterie board to fire me up, but I loved letting someone else do the heavy lifting by starting with a storebought deli platter. It meant I didn’t have to curate the selection of items, buy and open multiple packages, slice and cube cheeses, slice and roll meats, etc. I just tossed the one item in my cart and went home. A store-made Save-On-Foods deli platter makes fancy-looking charcuterie a breeze.
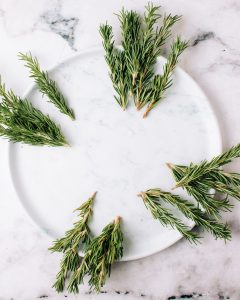
I hauled out a large marble serving plate as a base but you could alternatively use a cheeseboard or a cutting board. I created a rough outline of the wreath circumference with sprigs of rosemary. Often the rosemary sprigs are really long, so I just use scissors to cut them in half or in thirds to stretch them further. I love how rosemary draws to mind christmas tree branches. So festive.
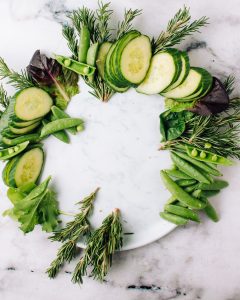
Next, I filled in the outline of the wreath with vegetables to make a fully green wreath base. This board was our dinner so I wanted to include some veggies, too.
I tucked the deli meats around the wreath asymmetrically. This tends to be more aesthetically pleasing than doing it symmetrically. Group items together rather than spreading them all out, and think about 12 o’clock, 2 o’clock and 9 o’clock positions as you arrange them around the circle. Turn the wreath and repeat with the cheeses. When I ordered my tray, I asked the Save On Foods deli staff to prepare some cheeses sliced and some cubed to have different textures, which creates pretty layers.
To finish the wreath, I added some nuts and honey in little bowls, along with a round serving spoon. This adds layers of circles to the wreath, which has a really pretty effect. Finally, I tucked some crackers into the last gap.

You could also add things like olives, fruit preserves, Western Family Antipasto (REALLY good), mustard or other spreads, a small bowl of dip for the veggies, cut-up fruit, etc. (What are your charcuterie and cheese board must haves?). You really just want to layer up the wreath to make it look abundant.
We enjoyed our charcuterie wreath with crackers, but also had some soft bakery buns to make our own sandwiches and turn it into a satisfying dinner. We had lots of charcuterie left over for sandwiches for several days. Easy lunches, what a bonus!
Get creative with this and make a Christmas tree instead of a wreath if you like. Start with the tip made of a rosemary in an A shape, and work downwards doing alternating layers of cheese, charcuterie, green veggies and horizontally-placed rosemary “branches”. Each layer should be a bit wider than the last. Add a slice of starfruit on top for the star on top of the tree, and make a trunk out of a small pile of crackers.
Save the rosemary to use in recipes – no need to waste it.
INGREDIENTS
1 Deli Platter from Save On Foods
1 bunch of rosemary
Stringless snap peas
½ cucumber
Handful of salad greens
Pecans
Favourite cheeseboard and charcuterie spreads (honey, preserves, mustard, etc.)
Crackers and/or bread to serve
INSTRUCTIONS
- Choose a serving plate, cheeseboard or cutting board large enough to fit a 12” circle.
- Start the wreath by roughly creating the circumference using small handfuls of rosemary.
- Fill the wreath shape in first with snap peas, lettuce, and slices of cucumber.
- Add the meats in clusters, then the cheeses. Don’t try to be too symmetrical. Small groupings look better than spreading everything out. Tuck small bowls of nuts and spreads into any gaps, and nestle crackers in last. Serve with crackers for snacking or with baguette or buns to make sandwiches for a meal.